WELCOME


Preparation and maintenance
Before you use the sewing machine for the first time, it is essential that you make yourself fully familiar with the functions of the sewing machine and discover how to use the sewing machine correctly.
Important: Unplug power cable when machine is not in use.
Important: Consult a qualified electrician if in doubt about connecting the machine to the power source. Unplug power cable if you are not using the power supply. The sewing machine must be used with the ELECTRONIC foot pedal (t) KD-2902/ FC-2902D (220-240V).
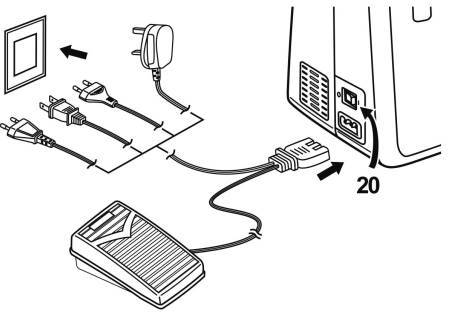 |
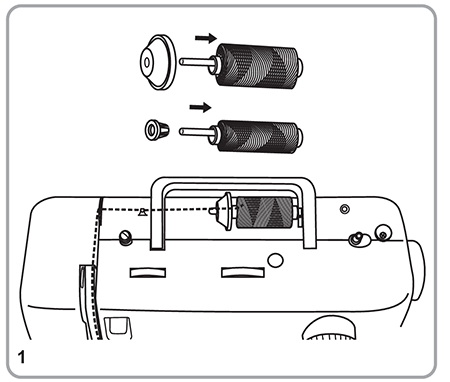
Connect the machine to a power source as illustrated in the adjacent drawing. Illumination |
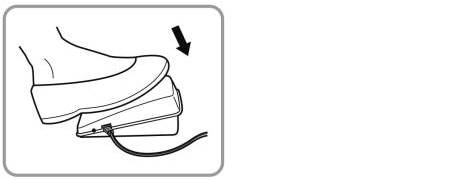 |
Foot pedal The operating speed of the machine is regulated with the pedal (u). |
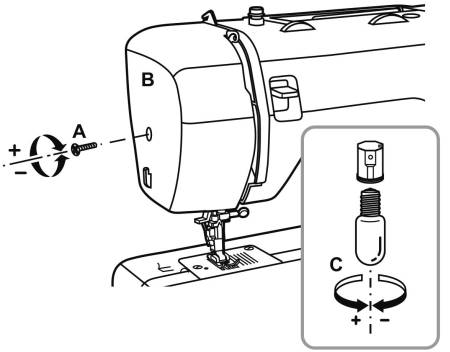 |
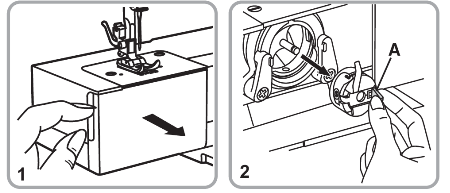
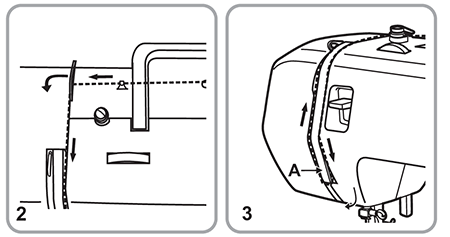
Disconnect the machine from the power supply by removing the plug from the mains socket! 1. Loosen screw (A) as illustrated. |
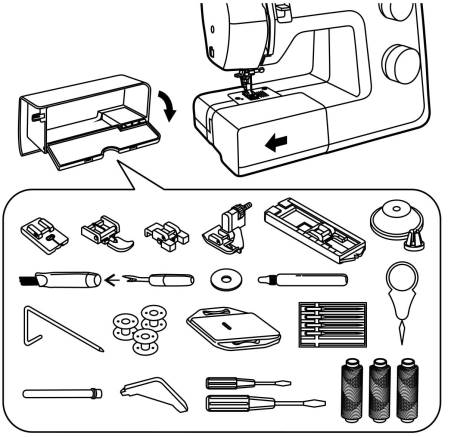 |
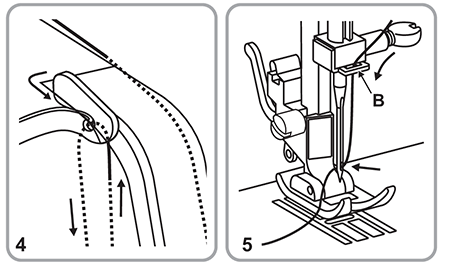
If you want to sew on the arm bed, pull out the snap-in sewing table (7) in the direction of the arrow.
The inside of the snap-in sewing table (7) can be utilised as an accessory box. Inside of the snap-in compartment the included accessories will be found. |
|
Important: Turn power switch (20) to off ("O")! |
|
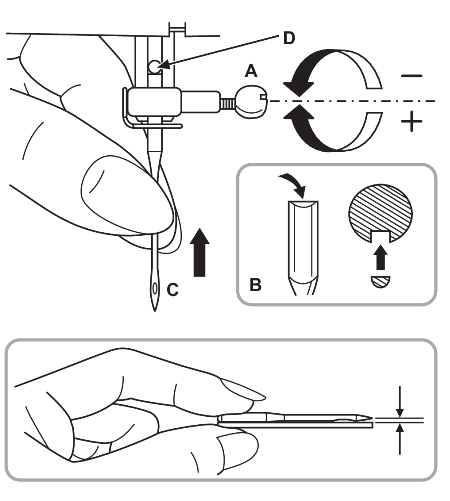 |
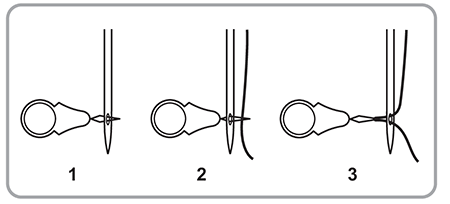
Change the needles regularly, especially at the first signs of problems when sewing. Insert the needle as in the illustration. Only use fully-functional needles. |
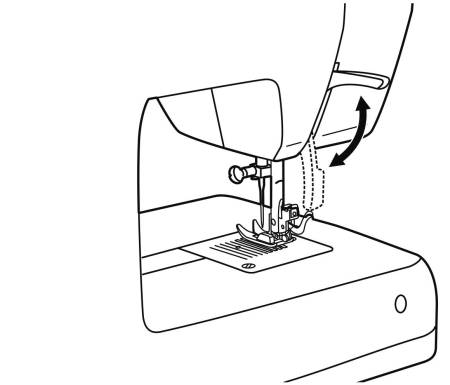 |
When sewing thick fabrics, the passage of fabrics under the presser foot can be improved by raising the two-step presser foot lifter (18) further (arrow). |
|
Important: Turn the main switch (20) to off ("O") when carrying out all the operations! |
|
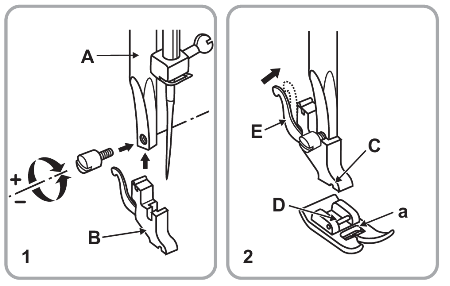 |
1. Install the presser foot holder 2. Inserting the presser foot
|
 |
3. Removing the presser foot 4. Inserting the edge/ quilt guide (q) |
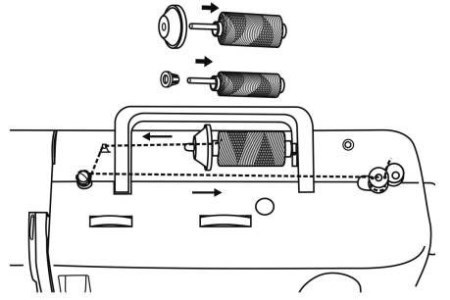 |
Place the spool (n) on the spool pin (15) and hold it in place with a spool pin cap (s). Pull the thread from the spool into the thread guide, and up to the bobbin (2). Pull the thread from the inside through a hole of the empty bobbin (h). Place the spool on the spool holder (14) and then push to the right into the filling position. |
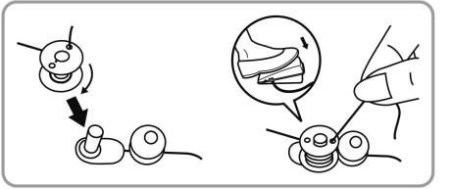 |
Hold the end of the thread. Press the pedal (u). Release the pedal (u) after a few turns. Release the thread and cut as close as possible to the spool. Press the pedal (u) again. Once the spool is full, it rotates more slowly. Release the pedal (u). Replace the bobbin (h) into sewing position and remove it. |
Note: If the bobbin winder spindle (14) is in the winding position, the sewing process is automatically interrupted. To sew, push the bobbin winder spindle (14) to the left (sewing position).
|
Important: Turn power switch (20) to off ("O")! |
|
 |
When inserting or removing the bobbin (h), the needle must be fully raised. 1. Open the hinged cover. 2. Pull the bobbin case tab (A) and remove the bobbin case. Hold the bobbin case with one hand. |
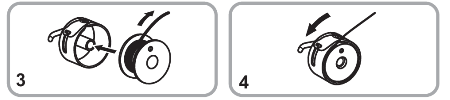 |
3. Insert the bobbin (3) so that the thread runs in a clockwise direction (arrow). 4/5. Pull the thread into the slit and under the tension spring. |
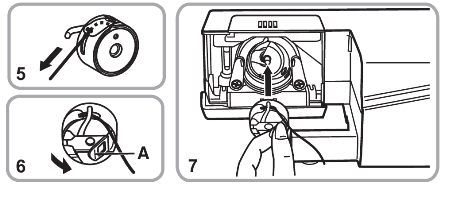 |
6. Hold the bobbin case between the index finger and thumb on the bobbin case tab (A). 7. Insert it into the shuttle race. |
|
Important: Set the main switch (20) to ("O"). Raise the presser foot bar by lifting the two-step presser foot lifter (18) and lift the thread lever (1) by turning the hand wheel (21) anti-clockwise. Follow the arrows and numbers on the sewing machine when threading. |
|
 |
1. Place the spool (n) on the spool pin (15) and hold it in place with a spool pin cap (s). - Small spool pin cap for thin threads |
 |
2. Guide the upper thread through the upper thread guide (16) and bobbin thread guide (2) from right to left, then move it forward into the right slot and guide it downwards. 3. Guide it to the left under the guide lug (A) and then upwards again. |
 |
4. Guide the thread from right to left through the thread lever (1) and then downwards. 5. Guide the thread first behind the large, metal thread guide (B) and then through the eye of the needle. Always thread the needle from the front. |
 |
Needle threader You can use the needle threader (g) as a threading aid. |
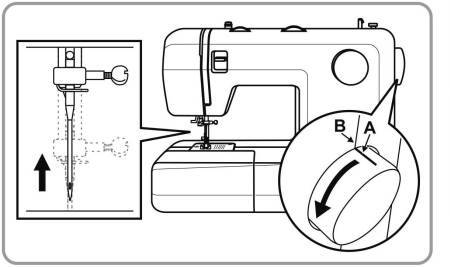 |
Attention: Turn power switch to "O" before threading the needle. Important: Raise the needle to its highest position by turning the hand wheel toward you until the mark (A) matched with the line (B) on the machine. |
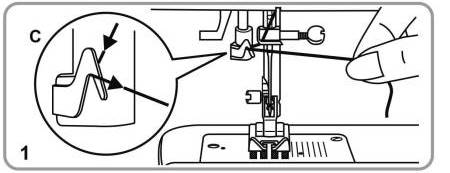 |
1. Lower the presser foot. Pass the thread around the thread guide (C). |
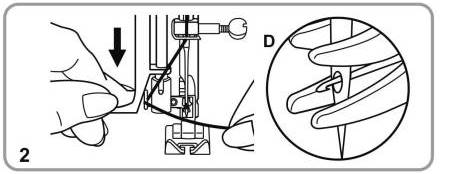 |
2. Press the lever down as far as it goes. The needle threader turns automatically to the threading position and the tiny hook pin passes through the needle eye (D). |
 |
3. Take the thread in front of the needle and make sure it is under the hook pin (E). Then hold the thread slightly upwards so that it hangs on the hook. |
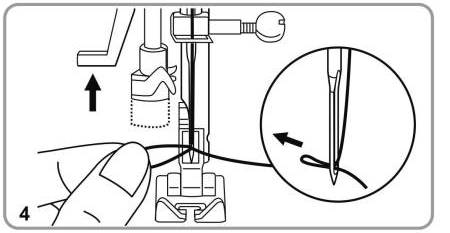 |
4. Hold the thread loosely and release the lever slowly. The hook will turn and pass the thread through the needle eye forming a loop. Pull the thread through the needle eye. |
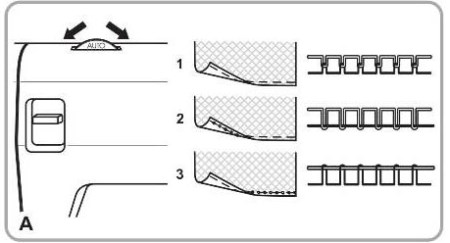 |
Upper thread tension (A) Basic upper thread tension setting: "AUTO" To increase the tension, turn the dial to the next higher number. To reduce the tension, turn the dial to the next lower number. Note: The upper thread tension must be set at 2-3 when sewing the lightweight fabrics, like silk and jersey etc. |
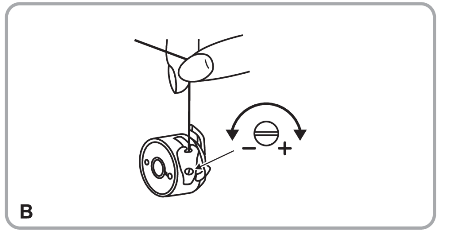 |
Lower thread tension (B) Note: The bobbin tension is adjusted correctly during manufacturing, therefore no changes are necessary. To test the bobbin thread tension, the full bobbin is placed in the bobbin case. The bobbin case and gripper are then suspended by the end of the thread. If the tension is correct, the thread will unwind by about 5 to 10 cm. when gently swung and will then remain suspended. If the full bobbin case unwinds, the tension is too slack. If the tension is too tight, it hardly unwinds or does not unwind at all. To adjust, use the small screwdriver (m). |
 |
Hold the end of the upper thread with the left hand. Turn the handwheel (21) in the anticlockwise direction until the needle is again raised (a complete revolution). |
 |
Pull on the upper thread to bring the lower thread up through the stitch plate hole. Lay both threads to the back under the presser foot. |
|
Important: Disconnect the machine from the electricity supply by removing the plug from the mains socket. When cleaning the machine, it must always be disconnected from the electricity supply. |
|
 |
Removing the stitch plate (A): Turn the handwheel until the needle is fully raised. Open the hinged front cover and remove the stitch plate screws with the L-screwdriver. |
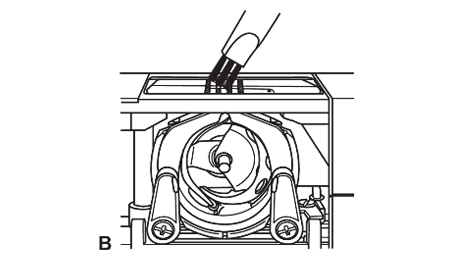 |
Cleaning the feed dog (B): Remove the bobbin case and use the brush supplied to clean the whole area. |
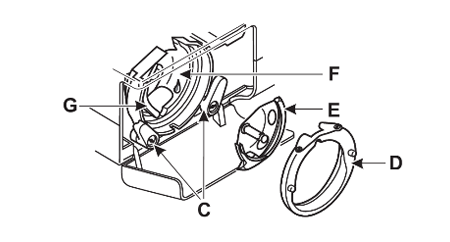 |
Cleaning and lubricating the catch (C-G): Remove the bobbin case. Snap the two catch retaining arms (C) outwards. Remove the shuttle race cover (D) and the catch (E) and clean with a soft cloth. Lubricate at the points indicated (F) (1-2 drops) using sewing machine oil. Turn the handwheel until the shuttle race (G) is in the left position. Replace the catch (E). Replace the shuttle race cover and snap back the two catch retaining arms. Insert the bobbin case and bobbin and replace the stitch plate. |
|
Important: Fabric fluff and threads must be removed regularly! |
|
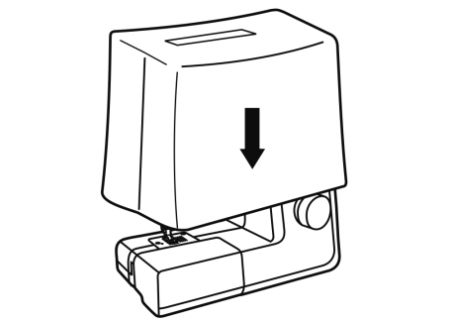 |
Always remove the power plug from the socket when not using the sewing machine. Use the dust cover provided. Store the sewing machine in a dry location which children cannot access. If the sewing machine is not used for an extended period, it should be protected from excessive dust, dirt or moisture. |
