WELCOME


Upper thread breaks
Threading the upper thread
|
Important: Set the main switch (20) to ("O"). Raise the presser foot bar by lifting the two-step presser foot lifter (18) and lift the thread lever (1) by turning the hand wheel (21) anti-clockwise. Follow the arrows and numbers on the sewing machine when threading. |
|
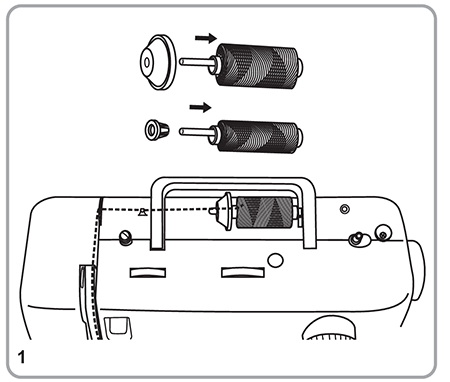 |
1. Place the spool (n) on the spool pin (15) and hold it in place with a spool pin cap (s). - Small spool pin cap for thin threads |
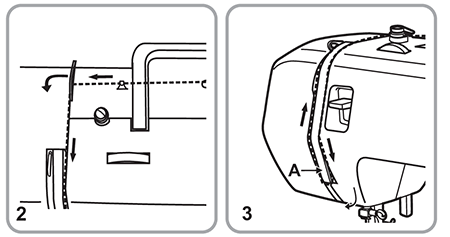 |
2. Guide the upper thread through the upper thread guide (16) and bobbin thread guide (2) from right to left, then move it forward into the right slot and guide it downwards. 3. Guide it to the left under the guide lug (A) and then upwards again. |
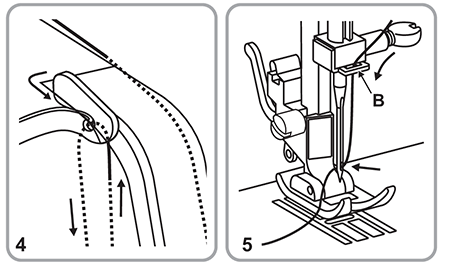 |
4. Guide the thread from right to left through the thread lever (1) and then downwards. 5. Guide the thread first behind the large, metal thread guide (B) and then through the eye of the needle. Always thread the needle from the front. |
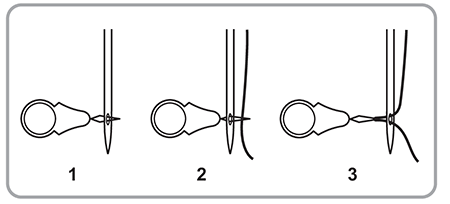 |
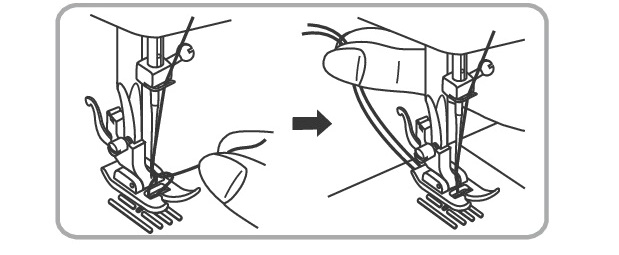
Needle threader You can use the needle threader (g) as a threading aid. |

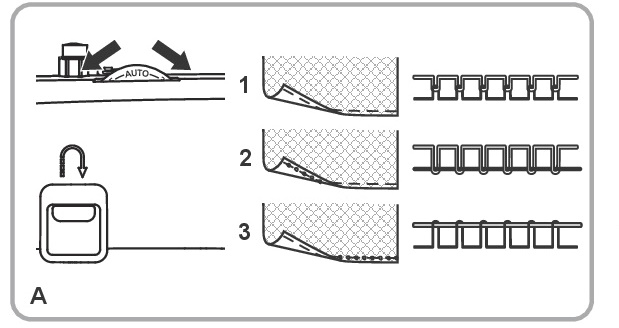 |
A. Upper thread tension Basic upper thread tension setting: "AUTO" To increase the tension, turn the dial to the next higher number. To reduce the tension, turn the dial to the next lower number. Note: The upper thread tension must be set at 2-3 when sewing the lightweight fabrics, like silk and jersey etc. |
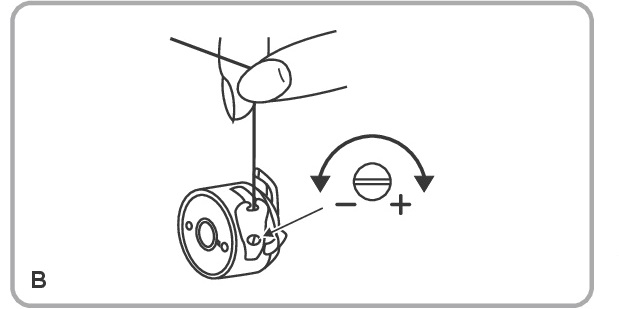 |
B. Lower thread tension Note: The bobbin tension is adjusted correctly during manufacturing, therefore no changes are necessary. To test the bobbin thread tension, the full bobbin is placed in the bobbin case. The bobbin case and gripper are then suspended by the end of the thread. If the tension is correct, the thread will unwind by about 1.97 to 3.94 inch. when gently swung and will then remain suspended. If the full bobbin case unwinds, the tension is too slack. If the tension is too tight, it hardly unwinds or does not unwind at all. To adjust, use the screwdriver. |

IMPORTANT: Match needle size to thread size and weight of fabric.
Please Note:
- In general, fine threads and needles are used for sewing fine fabrics, and thicker threads are used for sewing heavy fabrics.
- Always test thread and needle size on a small piece of fabric which will be used for actual sewing.
- Use the same thread for needle and bobbin.
- Use the stabilizer material for fine or stretchy fabrics, and select the correct presser foot.
- The upper thread tension must be set at 2-3 when sewing the lightweight fabrics, like silk and jersey etc.
|
Important: Turn power switch to off ("O")! |
|
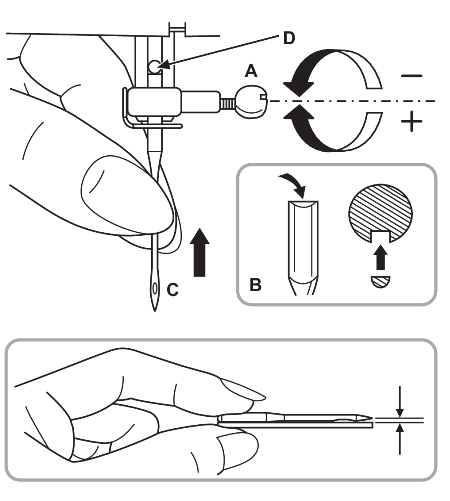 |
Change the needles regularly, especially at the first signs of problems when sewing. Insert the needle as in the illustration. Only use fully-functional needles. |
|
Important: Set the main switch (20) to ("O"). Raise the presser foot bar by lifting the two-step presser foot lifter (18) and lift the thread lever (1) by turning the hand wheel (21) anti-clockwise. Follow the arrows and numbers on the sewing machine when threading. |
|
|
1. Place the spool (n) on the spool pin (15) and hold it in place with a spool pin cap (s). - Small spool pin cap for thin threads |
|
2. Guide the upper thread through the upper thread guide (16) and bobbin thread guide (2) from right to left, then move it forward into the right slot and guide it downwards. 3. Guide it to the left under the guide lug (A) and then upwards again. |
|
4. Guide the thread from right to left through the thread lever (1) and then downwards. 5. Guide the thread first behind the large, metal thread guide (B) and then through the eye of the needle. Always thread the needle from the front. |
|
Needle threader You can use the needle threader (g) as a threading aid. |
Important: Unplug power cable when machine is not in use.
Important: Consult a qualified electrician if in doubt about connecting the machine to the power source. Unplug power cable if you are not using the power supply.
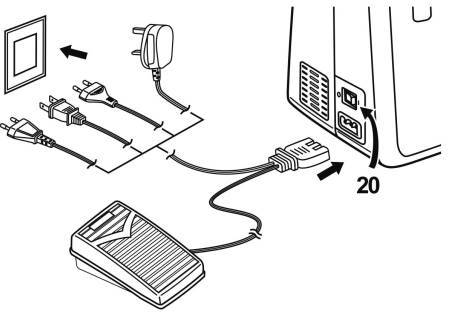 |
Connect the machine to a power source as illustrated in the adjacent drawing. Illumination |
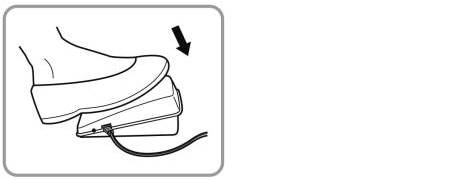 |
Foot pedal The operating speed of the machine is regulated with the pedal. |
