WELCOME


Upper thread breaks
Rethread the machine. |
|
Threading the upper thread |
|
|
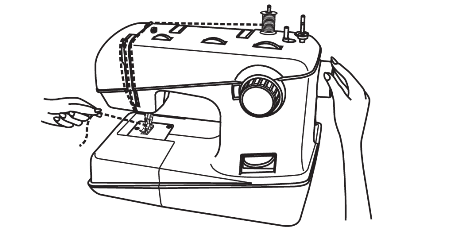
Important: Set the main switch to ("O"). Raise the presser foot bar by lifting the two-step presser foot lifter and lift the thread lever by turning the hand wheel anti-clockwise. Follow the arrows and numbers on the sewing machine when threading. |
|
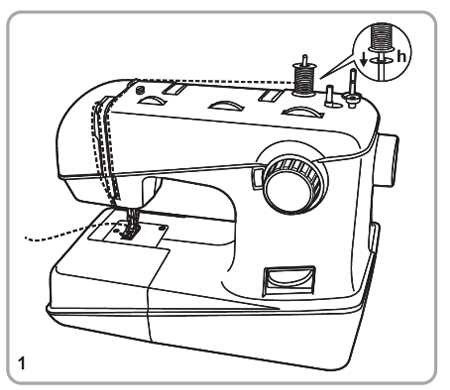 |
1. Pleace the felt cushion on the left thread spool pin. Place the spool of thread on the same thread spool pin. |
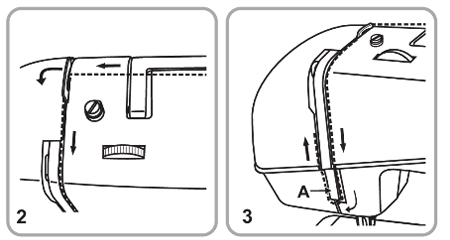 |
2. Guide the upper thread through the upper thread guide from right to left, then move it forward into the right slot and guide it downwards. 3. Guide it to the left under the guide lug (A) and then upwards again. |
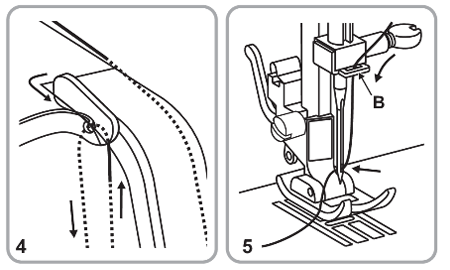 |
4. Guide the thread from right to left through the thread lever and then downwards. 5. Guide the thread first behind the large, metal thread guide (B) and then through the eye of the needle. Always thread the needle from the front. |
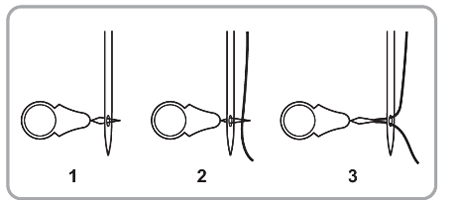 |
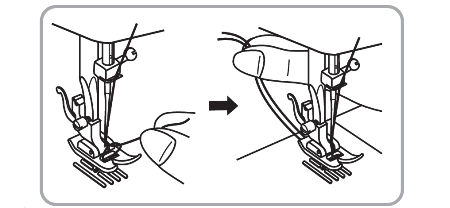
Needle threader You can use the needle threader as a threading aid. |
Inserting the bobbin |
|
|
Important: Turn power switch to off ("O"). |
|
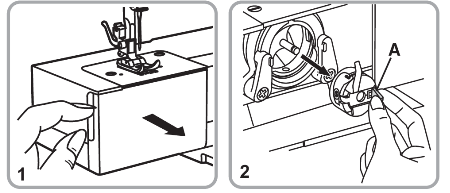 |
When inserting or removing the bobbin (h), the needle must be fully raised. 1. Open the hinged cover. 2. Pull the bobbin case tab (A) and remove the bobbin case. Hold the bobbin case with one hand. |
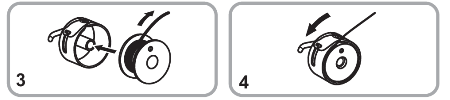 |
3. Insert the bobbin (3) so that the thread runs in a clockwise direction (arrow). 4/5. Pull the thread into the slit and under the tension spring. |
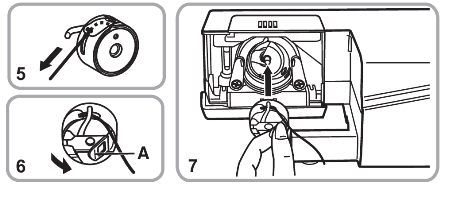 |
6. Hold the bobbin case between the index finger and thumb on the bobbin case tab (A).. 7. Insert it into the shuttle race. |
Bringing up the lower thread |
|
 |
Hold the end of the upper thread with the left hand. Turn the handwheel in the anticlockwise direction until the needle is again raised (a complete revolution). |
 |
Pull on the upper thread to bring the lower thread up through the stitch plate hole. Lay both threads to the back under the presser foot. |
Reduce the thread tension. (lower number) |
|
Thread tension |
|
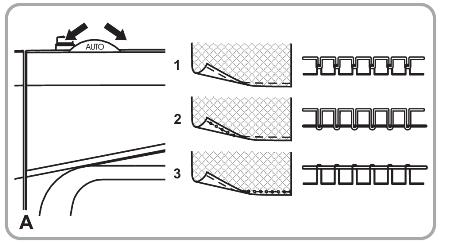 |
Upper thread tension (A) Basic upper thread tension setting: "AUTO" |
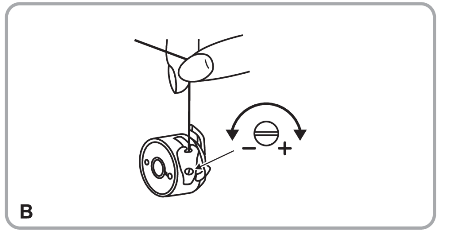 |
Lower thread tension (B) Note: DThe bobbin tension is adjusted correctly during manufacturing, therefore no changes are necessary. To test the bobbin thread tension, the full bobbin is placed in the bobbin case. The bobbin case and gripper are then suspended by the end of the thread. If the tension is correct, the thread will unwind by about 5 to 10 cm. when gently swung and will then remain suspended. If the full bobbin case unwinds, the tension is too slack. If the tension is too tight, it hardly unwinds or does not unwind at all. To adjust, use the small screwdriver. |
Use a larger needle. |
|
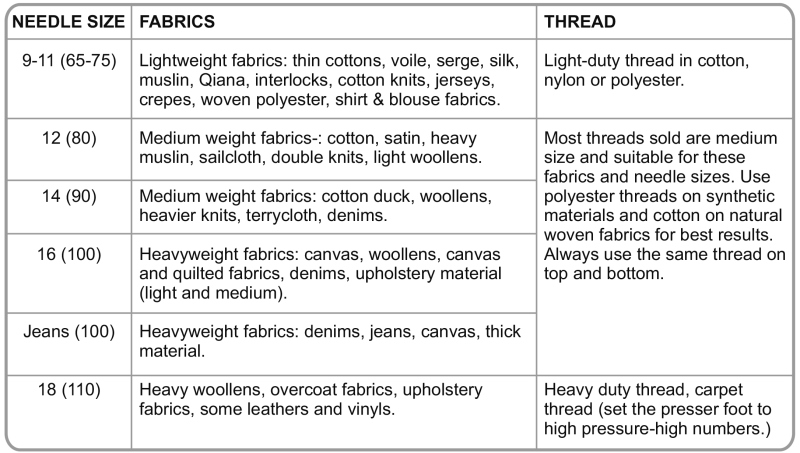
Matching the needle, fabric and thread |
|
|
NEEDLE, FABRIC, THREAD SELECTION GUIDE
|
|
|
Important: Match needle size to thread size and weight of fabric. Please Note:
|
Remove and reinsert the needle. (flat side towards the back) |
|
Inserting the needle |
|
|
Important: Turn power switch to off ("O")! |
|
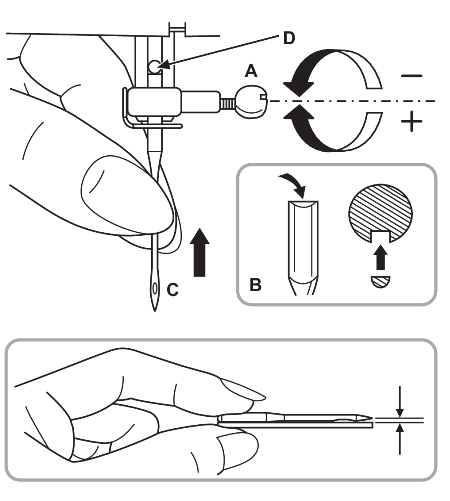 |
Change the needles regularly, especially at the first signs of problems when sewing. Insert the needle as in the illustration. Only use fully-functional needles. |
Remove the bobbin (g) and unwind the thread. |
|
Threading the upper thread |
|
|
Important: Set the main switch to ("O"). Raise the presser foot bar by lifting the two-step presser foot lifter (18) and lift the thread lever (1) by turning the hand wheel (21) anti-clockwise. Follow the arrows and numbers on the sewing machine when threading. |
|
|
1. Pleace the felt cushion on the left thread spool pin. Place the spool of thread on the same thread spool pin. |
|
2. Guide the upper thread through the upper thread guide from right to left, then move it forward into the right slot and guide it downwards. 3. Guide it to the left under the guide lug (A) and then upwards again. |
|
4. Guide the thread from right to left through the thread lever and then downwards. 5. Guide the thread first behind the large, metal thread guide (B) and then through the eye of the needle. Always thread the needle from the front. |
|
Needle threader You can use the needle threader as a threading aid. |
Replace the needle. |
|
Inserting the needle |
|
|
Important: Turn power switch to off ("O")! |
|
|
Change the needles regularly, especially at the first signs of problems when sewing. Insert the needle as in the illustration. Only use fully-functional needles. |